100 Days of CUDA
My Notes and codes documentation for CUDA learning journey
Summary of Day 01:
Went through the Book: Cuda By Example An Introduction to General-Purpose GPU Programming
Finished Chapter 1: Why CUDA? Why Now?
Summary of the chapter:
In this chapter, the authors explored the fascinating journey of parallel processing, from its humble beginnings with dual-core processors to today’s multi-core CPUs (8-core, 16-core, 32-core, and beyond). They highlighted how the clock speeds of CPUs have dramatically evolved—from 1 MHz in the 1980s to 4 GHz today, achieving speeds nearly 1,000 times faster than early personal computers.
However, as computational tasks like tumor detection or molecular simulations became increasingly complex, CPUs alone struggled to handle the workload. This challenge gave rise to GPU computing and the advent of CUDA (Compute Unified Device Architecture), which revolutionized how GPUs were used.
Initially, GPUs were designed strictly for graphics-intensive tasks, and programming them required converting projects into graphics-oriented code using languages like OpenGL, GLSL, or Microsoft HLSL. CUDA, introduced by NVIDIA, changed this paradigm by allowing developers to program GPUs directly using CUDA C, a language built on C/C++ but enhanced with GPU-specific functionalities.
The authors also discussed real-world applications that demonstrated CUDA’s transformative potential:
- Medical Imaging: CUDA enabled early breast cancer diagnosis, significantly speeding up and improving computational efficiency.
- Fluid Dynamics: Researchers at the University of Cambridge used CUDA to replace massive supercomputers with just 2-3 GPUs for fluid simulations, achieving higher efficiency.
- Environmental Science: CUDA-powered GPUs helped simulate the molecular structure of surfactants in detergents and shampoos, aiding advancements in material science.
This chapter emphasized the significance of CUDA in democratizing high-performance computing, showcasing how GPUs became instrumental in solving problems previously thought to require supercomputers.
Completed Chapter 2: Getting Started
-
Installation of CUDA Toolkit: Click here to redirect to the download page
-
Snapshots of Installation Process:
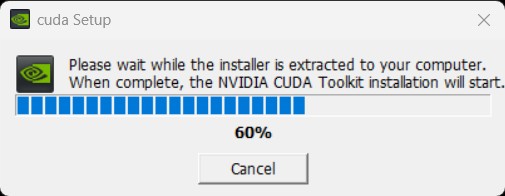
Image_1

Image_2
Summary of the chapter:
This chapter, focused entirely on setting up the CUDA Toolkit. It provided a detailed guide on how to install CUDA on various platforms, ensuring compatibility with different systems.
Starting Chapter 3: Introduction to CUDA C
First Program:
We started with a simple “Hello, World!” program and learned about two types of programs: host and device. The host code runs on the CPU, while the device code runs on the GPU.
For the host code, it is quite similar to standard C:
#include <iostream>

int main(void) {
    printf("Hello World 👋!");
    return 0;
}
For the device (GPU) code, it looks like this:
#include <iostream>

__global__ void kernel(void) {
}

int main(void) {
    kernel<<<1, 1>>>();
    printf("Hello World 👋!");
    return 0;
}
To run the kernel code (with a .cu file extension) in VS Code, you need to install the Nsight Visual Studio Code Edition extension.
If you encounter an error about cl.exe not being found, add the following paths to your system environment variables:
C:\Program Files\Microsoft Visual Studio\2022\Community\VC\Tools\MSVC\14.39.33519\bin\Hostx64\x64C:\Program Files\Microsoft Visual Studio\2022\Community\VC\Tools\MSVC\14.39.33519\bin\Hostx64\x64\cl.exe
Explaining the device code
- The syntax
__global__ void kernel(void)defines a function calledkernelthat runs on the GPU. The__global__keyword indicates that this function can be called from the host (CPU) and will execute on the device (GPU). - The triple angle brackets
<<<1, 1>>>specify the execution configuration for the kernel, where the first parameter is the number of thread blocks and the second parameter is the number of threads per block.